この記事はUnreal Engine 4(UE4) Advent Calendar 2019の22日目の投稿記事です。
Unreal Engine 4 (UE4)のカレンダー | Advent Calendar 2019 - Qiita
目次
環境
UE4.23.1
Visual Studio 2017 Community
結論
最初に結論だけを書きます。
Static Library, Dynamic-link Libraryどちらの場合も編集するのは .Build.cs です。
・共通(Static Libraryはこれで設定完了)
// インクルードファイルへのpath 情報を追加
// .h/.hpp ファイルを配置したディレクトリへのpathを記述
PublicSystemIncludePaths.Add(Path.Combine(LibraryPath, "include"));
// ライブラリへのpath 情報を追加
// .lib ファイルを格納したディレクトリへのpath を記述
PublicLibraryPaths.Add(Path.Combine(LibraryPath, "lib", "x64"));
// ライブラリをプロジェクトに追加
// .lib ファイルの名前を記述
PublicAdditionalLibraries.Add("LirbraryName.lib");
・Dynamic-link Library
// ライブラリをプロジェクトに追加
// .dll ファイルの名前を記述
 PublicDelayLoadDLLs.Add("LibraryName.dll");
// プロジェクトのパッケージング情報に.dll の情報を追加し、ファイルコピー
// .dll ファイルを格納したディレクトリへのpath を記述
 RuntimeDependencies.Add(Path.Combine(LibraryPath, "lib", "x64");
概要
今回はUE4で外部のライブラリ(Static Library, Dynamic-link library)の使用方法について書きます。
使用するライブラリは自作した簡単なライブラリを使用します。
Static Libraryはint の足し算を行うだけのもの : ExampleLib
Dynamic-link Libraryはint の引き算を行うだけのもの : ExampleDll
この2つを用意しました。
わざわざライブラリ化する意味は全くありませんが、使用方法の参考例として用意しました。
ライブラリの作成方法についてはUE4の話から逸れるため、作成方法などについては省略します。
下記ドキュメントを参考にしてください。
チュートリアル: スタティック ライブラリを作成して使用する (C++) | Microsoft Learn
Visual Studio で C/C++ DLL を作成する | Microsoft Learn
Static Libraryの作成
設定等は大幅に省いてざっくりとコードだけ載せます。
Dynamic-link libraryの作成
こちらも設定等は省いてコードだけ。
UE4でのLibraryの使用方法
ようやくUE4の話に戻ります。
まずは新規にUE4プロジェクトを作成します。
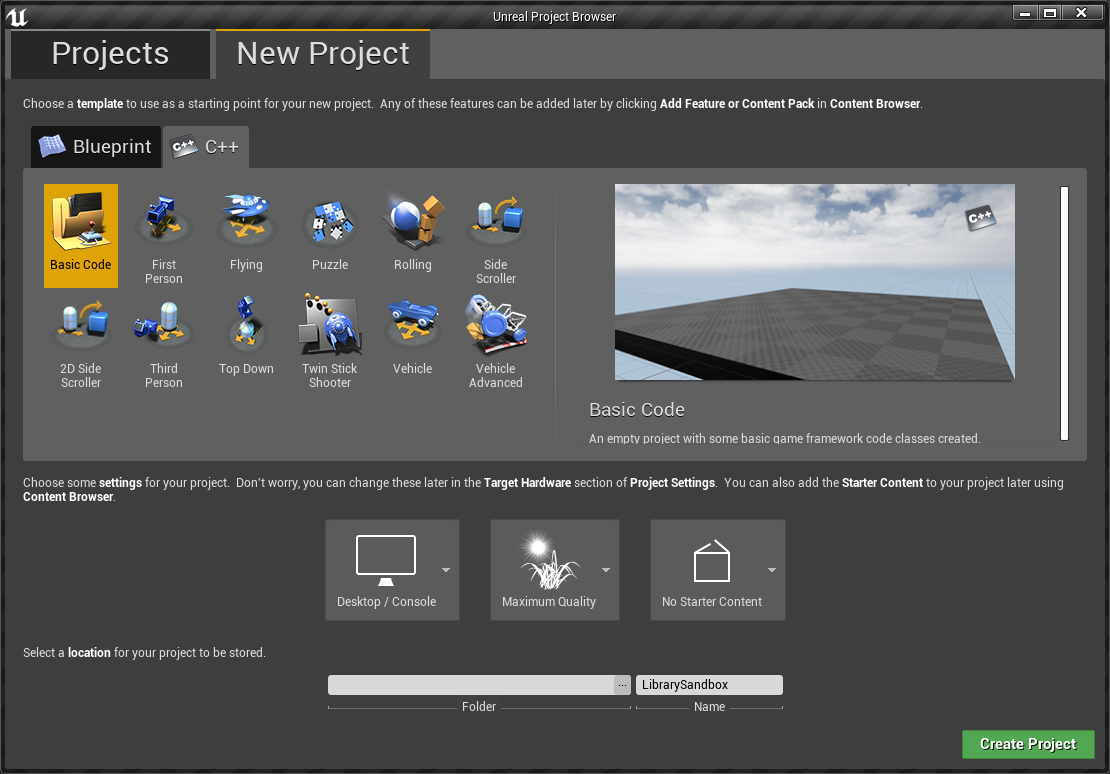
続いて使用するライブラリをそれぞれプロジェクトに紐付けるために適切なディレクトリに移します。
(ProjectRoot)\ThirdParty\ 以下にファイルを置くのが一般的でしょう。
ThirdPartyというフォルダは存在しないため、新規作成します。
例 :
(ProjectRoot)\ThirdParty\(LibraryName)\include\
(ProjectRoot)\ThirdParty\(LibraryName)\lib\(PlatformName)\
今回は以下のように配置しました。
・ Static Library
(ProjectRoot)\ThirdParty\ExampleLib\include\
(ProjectRoot)\ThirdParty\ExampleLib\lib\x64\
・Dynamic-link Library
(ProjectRoot)\ThirdParty\ExampleDll\include\
(ProjectRoot)\ThirdParty\ExampleDll\lib\x64
ライブラリに更新が入った時には
Generate Visual Studio project filesでプロジェクトを再生成しています。
これが正しいフローなのかどうかは疑問が残りますが、これでライブラリの更新は反映されます。
ライブラリのリンクについて編集するのは基本的に下記のファイルのみです。
(ProjectRoot)\Source\(ProjectName)\(ProjectName).Build.cs
今回の場合だと (ProjectRoot)\Source\LibrarySandbox\LibrarySandbox.Build.cs
コメント等を削除して、初期の記述状態は下記になります。
using UnrealBuildTool;

public class LibrarySandbox : ModuleRules
{
    public LibrarySandbox(ReadOnlyTargetRules Target) : base(Target)
    {
        PCHUsage = PCHUsageMode.UseExplicitOrSharedPCHs;

        PublicDependencyModuleNames.AddRange(new string[] { "Core", "CoreUObject", "Engine", "InputCore" });

        PrivateDependencyModuleNames.AddRange(new string[] { });
    }
}
ライブラリの使用準備にあたってThirdPartyへのFullPath取得のPropertyを追加します。
// Path使用のため追加
using System.IO;

public class LibrarySandbox : ModuleRules
{
    // 追加
    private string ThirdPartyPath
    {
        get { return Path.GetFullPath(Path.Combine(ModuleDirectory, "../../ThirdParty/")); }
    }
...
}
Static Libraryの使用方法
Static Libraryを使用するにあたっては下記へのファイル追加が必要です
・PublicSystemIncludePaths
・PublicLibraryPaths
・PublicAdditionalLibraries
includeファイルのディレクトリの追加、ライブラリへのpath の追加、ライブラリの追加です
今回の例では下記のようになります。
public class LibrarySandbox : ModuleRules
{
    ...
    public LibrarySandbox(ReadOnlyTargetRules Target) : base(Target)
    {
        ...
        PrivateDependencyModuleNames.AddRange(new string[] { });

        // 下記を追加
        string ExampleLibPath = Path.Combine(ThirdPartyPath, "ExampleLib");
        PublicSystemIncludePaths.Add(Path.Combine(ExampleLibPath, "include"));

        PublicLibraryPaths.Add(Path.Combine(ExampleLibPath, "lib", "x64"));
        PublicAdditionalLibraries.Add("ExampleLib.lib");
...
}
では実際に使用できるかコードを書いて確かめてみます。
GameModeのctorから呼び出してみます。
#include "LibrarySandboxGameModeBase.h"
#if PLATFORM_WINDOWS
#include "ExampleLib.h"
#include <memory>
#endif

ALibrarySandboxGameModeBase::ALibrarySandboxGameModeBase()
{
#if PLATFORM_WINDOWS
    const auto helloLib(std::make_shared<ExampleLib::HelloLib>());
    UE_LOG(LogTemp, Log, TEXT("Hello Static Library World : 1 + 2 = %d"), helloLib->Add(1, 2));
#endif
}
実行してみると無事に動作することが確認できました。
LogInit: FAudioDevice initialized.
LogLoad: Game class is 'LibrarySandboxGameModeBase'
LogTemp: Hello Static Library World : 1 + 2 = 3
手順としてはPublicSystemIncludePaths, PublicLibraryPaths, PublicAdditionalLibrariesに設定を記述するだけでプロジェクトから使用できるため比較的お手軽です。
Dynamic-link Libraryの使用方法
Dynamic-link Libraryを使用するにあたっては下記へのファイル追加が必要です
・PublicSystemIncludePaths
・PublicLibraryPaths
・PublicAdditionalLibraries
・PublicDelayLoadDLLs
・RuntimeDependencies
includeファイルのディレクトリの追加、ライブラリへのpath の追加、ライブラリの追加、ライブラリのパッケージング時のコピー
今回の例では下記のようになります。
public class LibrarySandbox : ModuleRules
{
    ...
    public LibrarySandbox(ReadOnlyTargetRules Target) : base(Target)
    {
        ...
        PrivateDependencyModuleNames.AddRange(new string[] { });

        // 下記を追加
        string exampleDllRootPath = Path.Combine(ThirdPartyPath, "ExampleDll");
        PublicSystemIncludePaths.Add(Path.Combine(exampleDllRootPath, "include"));

        string exampleDllPath = Path.Combine(exampleDllRootPath, "lib", "x64");
        PublicLibraryPaths.Add(exampleDllPath);
        PublicAdditionalLibraries.Add("ExampleDll.lib");

        string exampleDllName = "ExampleDll.dll";
        string exampleDllFullPath = Path.Combine(exampleDllPath, exampleDllName);
        PublicDelayLoadDLLs.Add(exampleDllName);
        RuntimeDependencies.Add(exampleDllFullPath);
...
}
実際に使用できるかコードを書いて確かめてみます。
GameModeのctorから呼び出してみます。
#include "LibrarySandboxGameModeBase.h"
#if PLATFORM_WINDOWS
#include "ExampleDll.h"
#include <memory>
#endif

ALibrarySandboxGameModeBase::ALibrarySandboxGameModeBase()
{
#if PLATFORM_WINDOWS
    const auto helloDll(std::make_shared<ExampleDll::HelloDll>());
    UE_LOG(LogTemp, Log, TEXT("Hello Dynamic-link Library World : 2 - 1 = %d"), helloDll->Sub(2, 1));
#endif
}
実行してみるとエラーが出ます。
delayhlp.cpp の中でKernelBase.dllで例外が発生したと表示されます。
これはBinaries/Win64/ 以下にdll が存在せずEditorから実行できません。
ですのでdll をBinaries/(Platforms)/以下にコピーするコードを追加します。
using System;
using System.IO;

public class LibrarySandbox : ModuleRules
{
    ...
    public LibrarySandbox(ReadOnlyTargetRules Target) : base(Target)
    {
        ...
        string exampleDllName = "ExampleDll.dll";
        string exampleDllFullPath = Path.Combine(exampleDllPath, exampleDllName);
        PublicDelayLoadDLLs.Add(exampleDllName);
        RuntimeDependencies.Add(exampleDllFullPath);
        CopyDll(exampleDllName, exampleDllFullPath);
    }

    // Binaries以下にdll をコピーする
    private void CopyDll(string dllName, string dllFullPath)
    {
        if (!File.Exists(dllFullPath))
        {
            Console.WriteLine("file {0} does not exist", dllName);
            return;
        }
        string binariesDir = Path.Combine(ModuleDirectory, "../../Binaries/Win64/");
        if (!Directory.Exists(binariesDir))
        {
            Directory.CreateDirectory(binariesDir);
        }
        string binariesDllFullPath = Path.Combine(binariesDir, dllName);
        if (File.Exists(binariesDllFullPath))
        {
            File.SetAttributes(binariesDllFullPath, File.GetAttributes(binariesDllFullPath) & ~FileAttributes.ReadOnly);
        }
        // try catchでくくっていないとパッケージ作成時にこけます
        try
        {
            File.Copy(dllFullPath, binariesDllFullPath, true);
        }
        catch (Exception ex)
        {
            Console.WriteLine("failed to copy file: {0}", dllName);
        }
    }
}
これで無事に動作することが確認できました。
LogInit: FAudioDevice initialized.
LogLoad: Game class is 'LibrarySandboxGameModeBase'
LogTemp: Hello Dynamic-link Library : 2 - 1 = 1
手順としてはPublicSystemIncludePaths, PublicLibraryPaths, PublicAdditionalLibraries, に設定を記述することに加えて
PublicDelayLoadDLLs, RuntimeDependenciesが追加されました。
RuntimeDependenciesは記述がなくとも動作しますが
これを設定していないとプロジェクトのパッケージング時にそのフォルダにDLLがコピーされないため
DLLがなくて動作しないという問題を避けることができます。
パッケージング後のディレクトリはWindows PC向けパッケージでは下記のようになります。
WindowsNoEditor\LibraySandbox.exe
WindowsNoEditor\LibrarySandbox\ThirdParty\ExampleDll\lib\x64\ExampleDll.dll
最後にbuild.cs と使用例を全文載せておきます。